Showing posts with label sewing. Show all posts

Wednesday, January 28, 2009

I'm still alive

Christmas really burned out my craftiness. I took on entirely too much. I haven't made anything since the day before Christmas. I've cut up a few things but they're just sitting on my sewing table. I've got some things to share, but no pictures. I just lost all interest. I do want to share what my stepdad made me for Christmas- a gorgeous mahogany wood thread rack and a quilt rack. My mom made me a darling wreath for my sewing room. Once I actually put that room back together I'll post pix! Here's Kaytlin's Christmas dress, I made it. I love the way it turned out. It was a challenge, ruffling all of that fabric... two layers of tulle net, thick taffeta, and the lining.

I had my surgery. You can find me at obesityhelp.com... my user name is kaytiebugs. I'm six days out. I haven't had solid foods in three weeks. I've lost 21 pounds and it's only getting better. I think for now my primary focus needs to be my health, not obsessive crafting and hoarding.

Love,
Amanda

Wednesday, December 17, 2008

100th post!!! Flower Encased Tutu Tutorial

Wow I can't believe this is my 100th post!! I was going to make this just a regular blog entry, showcasing my amazing iphone pictures of handmade Christmas gifts (lol at the 'amazing iphone pictures').... but I figured since this is somewhat of a monumental post, I should probably make it a little more than usual. Consider this a Christmas gift, from me to you. Alas...

The Flower Encased Tutu Tutorial!!

Supplies/Materials list-
1.5 yd chiffon (nylon works best), tulle, or some other sheer/opaque fabric.
3-5 floral stems of your choice (containing several flowers each)
Thread to match
Elastic (I use either 3/8" or 1/2"... pictured is 3/8")
And.... the almighty seam ripper, pins, scissors, measuring tape, etc.

Measurements and such-
I cut my 1 1/2 yards straight down the fold crease and made two. It came out to be about 14-15" long. I made them for twin 3yo little girls. If you want them longer, cut accordingly. Take your desired length, multiply by two, then add about 2.5" for the elastic casing. If you're making one for a girl older than 6ish, you should use about 1 3/4-2 yards instead. To get the right amount of elastic, you'll want to take the child's belly measurement and subtract a few inches (taking into consideration how stretchy the elastic is... some is more stiff and less stretchy than others).

Shall we begin?

Prep- Cut your fabric to the desired width (see above for suggestions), pull flowers off of the stems and discard the stems, and cut your elastic.

Step 1- Sew your two ends together so that you have a single layer tube. The seam should be the cut ends (NOT the slevadge ends.. the ends with little holes that looks different from the rest of the fabric).

Step 2- Fold the tube in half all the way around and pin it. You should have a two layer tube with the raw edges at the top and a fold at the bottom, like this... (BTW- blogland.... meet my sewing table). Pin in place at a few places so it's easier to work with.

Step 3- Sew it all together, leaving a 6" opening (you want the opening to be big enough to put your fist in... I made mine a bit too small).

Step 4- Fill 'er up with flowers!! The more the better... but that's just my opinion ;) Insert flowers through the opening. Shake them around and try to distribute them a bit so you can see when there's enough.


Step 5- Close the opening.

Step 6- Make your elastic casing. If you aren't using nylon fabric or some other non-fray fabric, you'll want to fold your raw edges under (unlike the picture, where the raw edges are left poking out, but my fabric is some kind of funky polyester/nylon half breed that doesn't fray). I fold the fabric over and since I'm using a 3/8" elastic, I make about a 3/4"-1" casing, so that it's easy to pull the elastic through. I hate using pins so there are none in any of the pictures, but you may want to pin things in place if you aren't good at eyeing seam accuracy. Make sure you leave an opening to run your elastic through!!


Step 7- Pull your elastic through the casing, sew the two ends together, and close up your casing. I purchased a strap turner (notions section at Joanns) and it has been an amazing tool. I use it to pull elastic through every time. It's basically a long skinny piece of metal with a hook at the end (you can see a bit of it in the above picture, it's to the right). I just hook the elastic and run it through as far as I can without bending the metal; then I pull it out, pin the exposed end of elastic, and insert it into the other side, hook that side of the elastic, and pull it through the rest of the way. It's quicker than the safety pin method, well... to me it is.

Step 8- Shift your flowers around a bit to distribute them evenly and VOILA! You're done!


I hope you've enjoyed this little free tutorial. If you have any questions or if something isn't quite clear, please shoot an email to kaytiebugs@yahoo.com or leave a comment below. I'd love to see your finished creations, so if you blog/flickr/etc. post a link to your post or picture so I can check it out!!

Friday, December 12, 2008

Some Christmas gifts

Forgiveness is all I'm asking of my blog readers for Christmas! Forgive me for still using crappy iphone pictures!! The iphone really does take good pictures if it's daylight or in a well lit room.

Here are a couple of things I've been working on.

The blanket is for my grandmother. It is my first ever quilt! It's a rag quilt, but still. It wasn't nearly as time consuming or detailed as a normal quilt, but it was a really good way to take a leap into the world of quilting. I'm making another one for my mom, hers is bears and such. It'll match her decor perfectly.
The other one is a flower encased tutu. I took pictures of the process so I could write a tutorial. I hope to have it done sometime in the next few days... but I've been working on the pettiskirt tutorial for months now and haven't gotten it done lol. Initially I was going to sell it, but honestly I think I'm just going to post it for free. I'm about halfway done writing it and I try to work on it here and there but it usually gets put on the back burner. The flower encased tutu, however, is pretty simple and won't take too long to write up.
I've also been working on felt food. I've never done felt food before. I'll elaborate more when I have pictures to show.
I've been working on pajama pants like a mad woman too. I have a pattern that's just one piece, so it's a bit quicker than the two piece pants patterns. They come together in a matter of maybe 15 minutes... hemming, elastic casing, and all.
Back to the sewing machine......
Happy Holidays!
Amanda

Friday, November 28, 2008

It's TIME!!!

Christmas Time, that is!! I so love the Holiday Season! The twinkling lights, the smell of cinnamon and Christmas trees in the air, the warm feeling of buying the most amazing gift for someone, that special air of love that floats around, even strangers are a bit more polite. I just love it.

To welcome the season, we have these... my first pair of crochet toe-up socks. These were surprisingly easier than I expected. My crochet abilities stop at squares and rectangles, so this was something new for me. It was a quick project and my daughter loves them... although she slips and slides around a lot lol. See the little snippet of our new floors? Wow that was a project. We'll get to that in a minute. Isn't she cute in her little tutu? The child loves dressup.


To something a bit more exciting..... below, you are viewing the very first Kaytiebugs pattern!! Well, the result of it anyway. This is the prototype. It's wrinkled and the pic was taken in poor lighting... but I'm using a camera phone so it can't get much better (do forgive the photo quality, my camera is dead and I'm not getting a new one for a couple of weeks). I drafted the pattern on gift tissue paper (that was the easy part). Then I started sewing. I can whip some clothes up in no time... but a lined handbag? I have made all of two different handbags... one was ugly and horrible, the other is this one... but it was easier because the pattern didn't require all of the seams be hidden, the base seams are bias taped around instead of flipped inside and concealed. It took a lot of head scratching, patience (which I have very little of), seam ripping, pinning, repinning, and ALAS I have my first completely custom designed handbag! Amy has something somewhat similar, but I didn't like the straps or the overall shape (or the thought of paying $15 for a pattern lol). It's hard to see in this picture, but there are two inward pleats on the front. It's fully lined and has a pocket inside (not a zippered pocket, you know how much I hate zippers).


Back to the floors. Wow. I had no idea laying new floors would be such a huge challenge!! We ripped up the old parquet floors that had a thick layer of glue holding them down. We had tile in the kitchen, but that came up very easily. It took my DH and step dad every bit of two full days to do the downstairs (not including the time it took to pull up the old floors and finish the baseboards). I know what you're thinking- "What kind of person in there right mind rips up real wood floors and replaces it with laminate?!?" 1) The previous homeowners installed the tile and parquet, and did a pretty poor job at it; 2) The parquet was not very pretty and the moment I saw the house I told my hubby "If we buy this house, I want new floors in less than a year." It was that bad.... one of the very few flaws in the house, but fixable; 3) Parquet is sooo 1995 lol kidding... it's just not my style (or the right color); 4 (and most important) our upstairs toilet flooded while we were away overnight.... the floor was destroyed beyond repair in a big section. We covered it with a rug until we were able to replace the floors. Ignore the random rug in the pics... it's been moved. And ignore the lack of finished baseboards... we've finished them.

Here's the old floor (before flooding)....
Here's the new floor (bad pic... poor lighting, camera phone)....

During the project...


We used Ikea Tundra flooring and Floor Muffler underlayment and I swear I can walk on the floor with heels on and it sounds thisclose to the same as walking on a regular non-floating floor. If you are going to get laminate, Floor Muffler is a MUST. Don't settle. Yes, it's twice as much as the regular stuff, but it's WELL worth it in the long run. Next redo- the kitchen cabinets... but that'll be a while.

In the meantime, we're currently building a luxury dog house for our 120lb half rottie half shepherd. Not really luxury lol, but it'll have a bit of lighting to provide heat, and we do plan to put Christmas lights on it and plant shrubs around it in the spring to make the area look nice. We're putting wide beadboard type stuff on the outside and painting it the same color as the house. It's about 5'x5' and the peak of the roof is about as tall as I am.... 5'4". I'll post pics when it's finished. K decided to crawl in there and decorate with her old bedroom decor... it's too cute. Rugs, wall hangings stuck in the framework, even a little table.

PS-
Only a child could spot an empty flooring box and see a robot! It took me a second, but then I saw it. She didn't do anything to the box, this is the way it looked laying out empty. She later colored it and put glitter on it. More amazing... she's wearing matching jammies! lol

In the next episode.... finished Handmade Holidays goodies (with pics from the camera phone *pouts*)! 5 things down.... 1945577 more to go!!

Friday, November 7, 2008

Hannah... I mean Kaytlin's Halloween

I finally got to sew something! My life has been incredibly busy lately... and what's strange is I haven't taken on any additional responsibilities, work any more hours, etc. Hubby started back in school for the fall and his classes have been HARD to say the least. I've had to pick up all of the housework. So.... no crafting =(


Until this.... The best Hannah Montana costume. I made the top, chopped up a denim jacket from goodwill, and paired it with a pair of cute jeans she already had, some bold accessories, and a Hannah Montana wig that K already had. I also made the headscarf and her trick or treat bag. I really wish I had better pictures to share. The sparkly didn't photograph well regardless of lighting.


You can't tell from the pictures, but it's a cowl neckline... the look was inspired by the shirt she's wearing in this picture. This pose is plastered all over HM memorabilia.


I used one of Kaytlin's t shirts as a template for the base of the shirt, then cut a rectangle of fabric and sewed it to the front top of the shoulders section. I didn't have time to use a pattern.

Friday, October 17, 2008

Pillowcase Dress Measurements +info for googlers

First and foremost.... please read this blog entry. It is very important. Thanks!

Sometimes I like to add posts just for the googlers... I know how it is to search the web over for info and can't find it. I noticed in my analytics today that someone landed on my page from google searching the above subject.


Here's how I do it....


For the length, I measure my DD from just below the collar bone down to the desired length (which for me is the knee), and add 1 1/2" seam allowance for the casing at the top and 1/2" seam allowance for the bottom hem.


For the width, I take the measurement of one of my daughters losely fitting shirts and add 3-5" depending on how puffy I want it to be.


I prefer more a pillowcase style top rather than a dress. They are still adorable and can be easily worn with pants. For that, I add about 3" onto the width of one of her shirts, for a dress I add about 5" to make it nice and full.


Here is the result.... (these are from this spring/summer)

Dress style


Top style


More for the googlers....

I bought the fabric for my daughters pettiskirt from AFC-Express. The fabric used is 15 denier nylon chiffon. BTW I will be selling the pettiskirt on ebay. As much as I hate to, I really need the money. Consider it like a charity auction lol. See here for more info on why.

An EXCELLENT place to get info for making bows (bow making for dummies) is http://www.hipgirlclips.com/forums/. Awesome. Lots of tutorials on making bows and running a successful hairbow business.

Monday, October 6, 2008

Birthday party!!

I'm waiting on pics from a couple of people, because I didn't get a chance to take very many at the party. I was a little too busy chasing children and entertaining.

Everything was so much fun! Everything turned out exactly the way I wanted it to. All of our guests seemed to have a good time.

Here are some pics of the decor. My mom and step dad did most of it (I was too busy being SICK all week and making her cake, which we'll discuss in a minute)....


I truly regret not taking more pictures!!! We had a big moonwalk and helium balloons tied everywhere.... on the front porch, back porch, chairs, etc.

And now on to the cake.... the final and last MMF cake I'll probably ever make....

It's a crappy pic, again... I'm sorry... I was seriously busy.

I made all of the little boys capes with there initials (hence why it's pretty important to SHOW UP when you say for weeks that you are coming ;-) but I still love you Miss B). All of the little girls got tutus in the theme colors.... pink, black, and white. I didn't have much black tulle so most of them were white and pink.

The little girl wore the pettiskirt outfit featured in my last post. I barely managed to put on makeup and clean clothing. I was sick all last week and I still don't feel that great. I've had a bad sinus infection. Ick. Not contageous though. And, yes.... I washed my hands repeatedly.

We played a game too... my mom (who did most of the work and the cleaning, thank you mom!!!!) hid fondant stars all around the downstairs and outside (it was a last minute game, otherwise I would have thought of something better to hide lol). Girls searched for pink stars, boys for white. The two who collected the most got a calendar (Mustang calendar for the boy, Tink calendar for the girl).

I bought the stuff for everyone to make their own hunky bead necklaces, but after K opened her presents everyone was pretty much interested in that. The little girls escaped to the bonus room to put in the Hannah Montana instructional dance DVD and the little boys were still looking for stars lol.... and playing outside.

Wednesday, October 1, 2008

Kaytlin's Birthday day & Pettiskirt

These pics are from yesterday, her 5th birthday! We're having her party this coming Saturday. I made the pettiskirt. I'm in the process of working up a tutorial, not sure if I'll give it away or sell it. If I sell it, it'll be $5 or less.

Good morning sunshine! Lets get that hair brushed! (note the pink streaks)

"Mommy, I want McDonalds for breakfast!" You got it babe...

"How old are you today, Kaytlin???" 5!

We picked her up from school with a huge balloon and a bouquet of flowers in tow.


"Let me in! I want my presents!" Check out the bow.... thanks appleblossombows! The bow rocks!!!


I LOVE my new room!!

True Divas do wardrobe changes =)


We went out and ate mexican.... the pictures are on Matt's phone. I'll post those later. Cute. I made the skirt and the shirt is a iron on rhinestone applique. The pettiskirt was not easy.... well, it was easy, but it took HOURS AND HOURS!


Here's a video of the "Grand reveal" of her gifts from us...

>>>> Okay I totally tried to use the blogger video upload function but it took 2 hours and still wasn't done loading, so here's the youtube video!!

http://www.youtube.com/watch?v=Hyn-166GKuw

Tuesday, August 12, 2008

The most beautiful place in Georgia


If you read this all the way to the bottom, I've got a secret to share with you. But first, I'm going to tell you about my weekend.


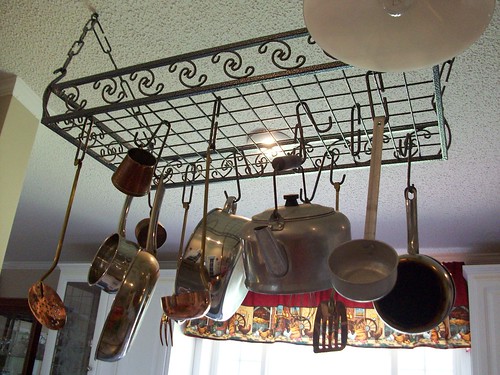
While Matt was in Panama City scuba diving with his dad, I went to my moms for the weekend. She lives in the North Georiga mountains, the most beautiful place in Georgia. Parts of it seem untainted... everything is small, simple, and easy going. It doesn't take an hour to go 20 miles (and if it does, it's because you had to cross three mountains to get there, not because there was a jacknife tractor trailer and two fender benders in the interstate). People are friendly. Things have a wonderful timeless feel... and everything "old" is embraced with the term "antique". Hence the picture.... see the copper cooking utensils? I told my mom to write in her will that those are MINE! lol


So what did we do all weekend? Well... I worked on those roman shades for my coworker, no fun. This project is much harder than I anticipated. Not to mention the fact that it's HOT! I've constantly got 10 feet of upholstery weight fabric sitting in my lap! It's been quite a challenge, and a learning experience. I am trying to compare it to what quilting would be like... working on such a huge amount of fabric.

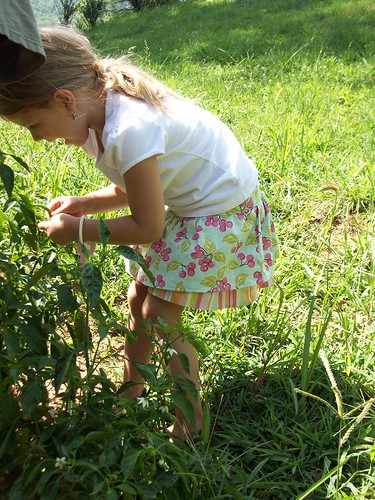
We picked tons of tomatoes and peppers. I have so much I don't even know what to do with it!
K went for a ride on Dollar.


I also learned how to make homemade salsa! My mom has a big garden, and all of her family members do too... so they kind of share crop. They all help each other when harvest time comes. We used home grown peppers, tomatoes, and *cough* store bought onions... among other secret family ingredients. I never knew my muscles could actually grow tired from chopping veggies!


I created a flickr set titled 'My Faves'. I just looked at it... and it's like if my life were flashing before my eyes, these would be some of the images that would appear.

Wednesday, August 6, 2008

How ‘bout them Dawgs!!!


The first UGA game is August 30th!!! Less than a month away! We (Matt, myself, Kaytlin, most of my family members, and MOST of my friends… well, all except Josh, he’s a Tech fan… heffer… lol, Kaytlin gives him hell about it, well… we all kinda do).

So what better way to commemorate the first game than making something absolutely adorable for Kaytlin that goes with the theme?!?! This is what I have in the works. At first I wanted it to be a skirt with matching appliqué top and I wanted to make a twirly skirt tutorial, but honestly I’d rather make it a dress or something. I think I might still make a tutorial though, and include pattern pieces for the bodice (and maybe some other pieces) in a PDF. Here’s what I’ve got so far… a ton of cut up squares and a strip that was going to be the casing for the waistband. I love the fabric combo…. UGA, red polka dots, black polka dots, and Michael Miller paw prints. May I just say that the makers of the UGA fabric did a terrible job of printing it. The fabric is kind of like a grid…. And it wasn’t printed straight on the bolt, plus those straight white lines… not very straight when you hold a ruler up to it to cut on them… I adore the print, but if I could buy the same thing from a different manufacturer I would. PS- I decided against the gingham band if I do the skirt, it just didn't match as well as I thought it would.


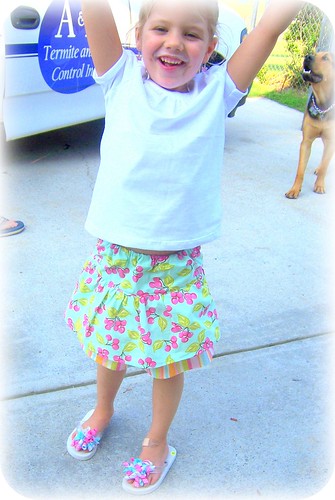
And here’s that tiered skirt I mentioned before. I still need to wrangle up K for a little “photo shoot” so I can list this skirt on etsy, but we’ve been super busy lately. For the last few months she’s dreaded “modeling”. Like the milk mustache? We were running out the door and I wanted to snap some pics just in case she spilled koolaid on it before we got to do a real modeling session.


I’ve been employed to make some soft fold roman shades. I’m excited and nervous at the same time. The instructions are relatively simple, but geez cutting 2 ½ YARDS in a straight line sounds just a tad bit intimidating. Luckily I’ve got a yard stick and some awesome scissors! I’ll post progress pics.