Wednesday, January 28, 2009

I'm still alive

Christmas really burned out my craftiness. I took on entirely too much. I haven't made anything since the day before Christmas. I've cut up a few things but they're just sitting on my sewing table. I've got some things to share, but no pictures. I just lost all interest. I do want to share what my stepdad made me for Christmas- a gorgeous mahogany wood thread rack and a quilt rack. My mom made me a darling wreath for my sewing room. Once I actually put that room back together I'll post pix! Here's Kaytlin's Christmas dress, I made it. I love the way it turned out. It was a challenge, ruffling all of that fabric... two layers of tulle net, thick taffeta, and the lining.

I had my surgery. You can find me at obesityhelp.com... my user name is kaytiebugs. I'm six days out. I haven't had solid foods in three weeks. I've lost 21 pounds and it's only getting better. I think for now my primary focus needs to be my health, not obsessive crafting and hoarding.

Love,
Amanda

Friday, December 19, 2008

Put on jammies, get comfy, and....

READ!

I cannot stress enough the importance of reading to your children. The benefits of reading to children are immense and considering the attention span of the average blog reader, I'll try to summarize as best as I can- It molds our kids into becoming readers, it expands there vocabulary and ability to form well structured sentences, it provides quality bonding time, it builds listening skills, increases a child's attention span, helps them learn to concentrate, it develops and fosters a child's natural curiosity, etc.

In the last couple of years, I've developed an interest in donating to worthy causes. Typically, anything that involves helping children pulls at my heart strings. Consider my side bar to be Exhibit A.

Something grabbed my attention while wandering about the web this morning, and it made me think "You mean, not everyone reads to their children daily?" I've always thought of it as part of the routine.... feed them, bathe them, and read books. I began to research more. As it turns out, many households don't even have books. Then I sat back and thought about how many times I've spent the night at other peoples houses, and at bedtime looked around their child's room for a book or two to read K, and not being able to find one. Kaytlin must have books read to her at bedtime. It's a long lived ritual and if it doesn't happen she just doesn't know what to do. Now we bring books with us on overnight trips.

Thanks to our long commitment to reading books, K has an excellent vocabulary and forms sentences that most other 5 year olds would never even think of forming. For me, this is a by-product, not the primary reason. I do it because it provides us with time to settle in from a long day before going to sleep. It provides us with cuddle time, time for her to ask one million questions, time for her to learn something new that she isn't learning about in school, time for me to be the teacher.

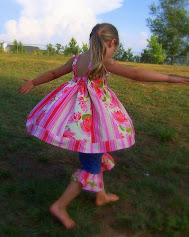
(K right before bedtime... she was cold so she put a pullover on until it was time to go to sleep, do admire the mama made crochet leg warmers =), I couldn't find a pic of us reading, but this was right before book time)
Which brings me to my newest charitable cause: First Book. According to there site- "First Book provides new books to children in need, addressing one of the most important factors affecting literacy – access to books. An innovative leader in social enterprise, First Book has distributed more than 60 million free and low cost books in thousands of communities." For every $2.50 donated, a book is provided for a child in need.
If you are looking to promote reading and provide low income families with books for there children, please consider donating to First Book.
They need not only funding, but volunteers. Please see the site for additional information.


My search for an affordable, yet quality, gift for my nieces/nephews/young cousins is over..... everyone is getting books.

Wednesday, December 17, 2008

100th post!!! Flower Encased Tutu Tutorial

Wow I can't believe this is my 100th post!! I was going to make this just a regular blog entry, showcasing my amazing iphone pictures of handmade Christmas gifts (lol at the 'amazing iphone pictures').... but I figured since this is somewhat of a monumental post, I should probably make it a little more than usual. Consider this a Christmas gift, from me to you. Alas...

The Flower Encased Tutu Tutorial!!

Supplies/Materials list-
1.5 yd chiffon (nylon works best), tulle, or some other sheer/opaque fabric.
3-5 floral stems of your choice (containing several flowers each)
Thread to match
Elastic (I use either 3/8" or 1/2"... pictured is 3/8")
And.... the almighty seam ripper, pins, scissors, measuring tape, etc.

Measurements and such-
I cut my 1 1/2 yards straight down the fold crease and made two. It came out to be about 14-15" long. I made them for twin 3yo little girls. If you want them longer, cut accordingly. Take your desired length, multiply by two, then add about 2.5" for the elastic casing. If you're making one for a girl older than 6ish, you should use about 1 3/4-2 yards instead. To get the right amount of elastic, you'll want to take the child's belly measurement and subtract a few inches (taking into consideration how stretchy the elastic is... some is more stiff and less stretchy than others).

Shall we begin?

Prep- Cut your fabric to the desired width (see above for suggestions), pull flowers off of the stems and discard the stems, and cut your elastic.

Step 1- Sew your two ends together so that you have a single layer tube. The seam should be the cut ends (NOT the slevadge ends.. the ends with little holes that looks different from the rest of the fabric).

Step 2- Fold the tube in half all the way around and pin it. You should have a two layer tube with the raw edges at the top and a fold at the bottom, like this... (BTW- blogland.... meet my sewing table). Pin in place at a few places so it's easier to work with.

Step 3- Sew it all together, leaving a 6" opening (you want the opening to be big enough to put your fist in... I made mine a bit too small).

Step 4- Fill 'er up with flowers!! The more the better... but that's just my opinion ;) Insert flowers through the opening. Shake them around and try to distribute them a bit so you can see when there's enough.


Step 5- Close the opening.

Step 6- Make your elastic casing. If you aren't using nylon fabric or some other non-fray fabric, you'll want to fold your raw edges under (unlike the picture, where the raw edges are left poking out, but my fabric is some kind of funky polyester/nylon half breed that doesn't fray). I fold the fabric over and since I'm using a 3/8" elastic, I make about a 3/4"-1" casing, so that it's easy to pull the elastic through. I hate using pins so there are none in any of the pictures, but you may want to pin things in place if you aren't good at eyeing seam accuracy. Make sure you leave an opening to run your elastic through!!


Step 7- Pull your elastic through the casing, sew the two ends together, and close up your casing. I purchased a strap turner (notions section at Joanns) and it has been an amazing tool. I use it to pull elastic through every time. It's basically a long skinny piece of metal with a hook at the end (you can see a bit of it in the above picture, it's to the right). I just hook the elastic and run it through as far as I can without bending the metal; then I pull it out, pin the exposed end of elastic, and insert it into the other side, hook that side of the elastic, and pull it through the rest of the way. It's quicker than the safety pin method, well... to me it is.

Step 8- Shift your flowers around a bit to distribute them evenly and VOILA! You're done!


I hope you've enjoyed this little free tutorial. If you have any questions or if something isn't quite clear, please shoot an email to kaytiebugs@yahoo.com or leave a comment below. I'd love to see your finished creations, so if you blog/flickr/etc. post a link to your post or picture so I can check it out!!

Friday, December 12, 2008

Some Christmas gifts

Forgiveness is all I'm asking of my blog readers for Christmas! Forgive me for still using crappy iphone pictures!! The iphone really does take good pictures if it's daylight or in a well lit room.

Here are a couple of things I've been working on.

The blanket is for my grandmother. It is my first ever quilt! It's a rag quilt, but still. It wasn't nearly as time consuming or detailed as a normal quilt, but it was a really good way to take a leap into the world of quilting. I'm making another one for my mom, hers is bears and such. It'll match her decor perfectly.
The other one is a flower encased tutu. I took pictures of the process so I could write a tutorial. I hope to have it done sometime in the next few days... but I've been working on the pettiskirt tutorial for months now and haven't gotten it done lol. Initially I was going to sell it, but honestly I think I'm just going to post it for free. I'm about halfway done writing it and I try to work on it here and there but it usually gets put on the back burner. The flower encased tutu, however, is pretty simple and won't take too long to write up.
I've also been working on felt food. I've never done felt food before. I'll elaborate more when I have pictures to show.
I've been working on pajama pants like a mad woman too. I have a pattern that's just one piece, so it's a bit quicker than the two piece pants patterns. They come together in a matter of maybe 15 minutes... hemming, elastic casing, and all.
Back to the sewing machine......
Happy Holidays!
Amanda

Monday, December 8, 2008

The stockings were hung....

I absolutely L-O-V-E Christmastime. I'm not sure if it's the happiness that buzzes in the air, the insane amount of shopping, redecorating my house, twinkling lights, the smell of real Christmas trees, warm fires, that special feeling that only comes this time of year, listening to Christmas songs on the radio and being reminded of my fondest childhood memories, creating new memories with my family, or maybe it's that whole getting presents thing.... lol. I just love Christmas and everything that comes with it.

We just finished decorating our house and I just love it. We don't have anything new (yet), but the same ole stuff still brings about a certain magic. Especially my Christmas tree ornaments. I started out with an awesome purple and blue getup that my dad won at Target. He had his choice of any of the pre-decorated tree displays. He picked the purple tree because it is my favorite color. When I moved out on my own, he gave it to me. Tons of lights, ornaments, even an angel and ribbon. I used it for a couple of years. As much as I absolutely loved it, hubby HATED it. Plus it didn't suit our decor nor my personal tastes as an adult. So... I slowly started to buy burgundy and gold decorations. We've accumulated what I think is an acceptable amount. I just love gobs and gobs of ornaments. Some folks like just a handful of ornaments.... I want an ornament every 6" or so.

I'm holding out on the big reveal until the end.... (not like you can't just scroll down anyway lol)

Here are some of my fave ornaments/decorations...


Here are some pics of the process... DH and DD are too cute....

Nutcrackers are creepy and go on the back of the tree....
This tree goes above the door in a window....
Here... (it fits... it's a squeeze, but it fits... and it looks nice from the road)(admire the new floors)

And alas.... the big reveal....


Here she is....


Monday, December 1, 2008

Super Easy Hairbow Holder Tutorial


I made this for my daughter and everyone just loves it. You've probably seen similar ones on etsy selling for $15-20+. If you're like me, you probably have the bulk of the supplies necessary already on hand... so this is a very affordable project.

Supplies
Letter (from craft store, various styles and sizes available)
Grosgrain ribbon
Hot glue gun or E6000
Pre-finished wood embellishments (also in craft stores)
Scissors
Lighter, fray check, or wood burner

1) Paint your letter in the desired color using craft paint. I painted mine solid white, but you could do polka dots or any other design. I'm just not that good with painting, my medium is definitely fabric lol. Let your letter dry completely before gluing anything to it.

2) Cut ribbon strips, I did mine roughly 18" and 16" long. Cut the ends at an angle and seal the edges with either the lighter or the fray check (or cut the ribbon with your wood burner).

3) Cut two more ribbon strips at your desired length. These will go at the top of the letter. Cut them long if you want them drapy, or cut them short. Play with the lengths before cutting. I did mine at about 24" long each. Glue the ribbon to the back of the letter.

4) Once your letter is dry, glue the ribbon to the back of the letter.

5) Play with the embellishments, try different locations until you find the way you think it looks best. Glue the embellishments on.

Wait for the glue to dry completely before hanging. Attach to the wall using a hook, nail, etc. You could also get picture hanging hardware and attach it to the back of the letter, and skip adding the ribbon, so that the letter itself is hung to the wall.

Have fun! I spent less than $5 on the letter and the wood embellishments, I had the rest of the supplies on hand. Pair this with a hairbow from Apple Blossom Bows and you've got one great Christmas gift!! Apple Blossom Bows is the wonderful etsy boutique who custom made Kaytlin's awesome Birthday hairbow.

Friday, November 28, 2008

It's TIME!!!

Christmas Time, that is!! I so love the Holiday Season! The twinkling lights, the smell of cinnamon and Christmas trees in the air, the warm feeling of buying the most amazing gift for someone, that special air of love that floats around, even strangers are a bit more polite. I just love it.

To welcome the season, we have these... my first pair of crochet toe-up socks. These were surprisingly easier than I expected. My crochet abilities stop at squares and rectangles, so this was something new for me. It was a quick project and my daughter loves them... although she slips and slides around a lot lol. See the little snippet of our new floors? Wow that was a project. We'll get to that in a minute. Isn't she cute in her little tutu? The child loves dressup.


To something a bit more exciting..... below, you are viewing the very first Kaytiebugs pattern!! Well, the result of it anyway. This is the prototype. It's wrinkled and the pic was taken in poor lighting... but I'm using a camera phone so it can't get much better (do forgive the photo quality, my camera is dead and I'm not getting a new one for a couple of weeks). I drafted the pattern on gift tissue paper (that was the easy part). Then I started sewing. I can whip some clothes up in no time... but a lined handbag? I have made all of two different handbags... one was ugly and horrible, the other is this one... but it was easier because the pattern didn't require all of the seams be hidden, the base seams are bias taped around instead of flipped inside and concealed. It took a lot of head scratching, patience (which I have very little of), seam ripping, pinning, repinning, and ALAS I have my first completely custom designed handbag! Amy has something somewhat similar, but I didn't like the straps or the overall shape (or the thought of paying $15 for a pattern lol). It's hard to see in this picture, but there are two inward pleats on the front. It's fully lined and has a pocket inside (not a zippered pocket, you know how much I hate zippers).


Back to the floors. Wow. I had no idea laying new floors would be such a huge challenge!! We ripped up the old parquet floors that had a thick layer of glue holding them down. We had tile in the kitchen, but that came up very easily. It took my DH and step dad every bit of two full days to do the downstairs (not including the time it took to pull up the old floors and finish the baseboards). I know what you're thinking- "What kind of person in there right mind rips up real wood floors and replaces it with laminate?!?" 1) The previous homeowners installed the tile and parquet, and did a pretty poor job at it; 2) The parquet was not very pretty and the moment I saw the house I told my hubby "If we buy this house, I want new floors in less than a year." It was that bad.... one of the very few flaws in the house, but fixable; 3) Parquet is sooo 1995 lol kidding... it's just not my style (or the right color); 4 (and most important) our upstairs toilet flooded while we were away overnight.... the floor was destroyed beyond repair in a big section. We covered it with a rug until we were able to replace the floors. Ignore the random rug in the pics... it's been moved. And ignore the lack of finished baseboards... we've finished them.

Here's the old floor (before flooding)....
Here's the new floor (bad pic... poor lighting, camera phone)....

During the project...


We used Ikea Tundra flooring and Floor Muffler underlayment and I swear I can walk on the floor with heels on and it sounds thisclose to the same as walking on a regular non-floating floor. If you are going to get laminate, Floor Muffler is a MUST. Don't settle. Yes, it's twice as much as the regular stuff, but it's WELL worth it in the long run. Next redo- the kitchen cabinets... but that'll be a while.

In the meantime, we're currently building a luxury dog house for our 120lb half rottie half shepherd. Not really luxury lol, but it'll have a bit of lighting to provide heat, and we do plan to put Christmas lights on it and plant shrubs around it in the spring to make the area look nice. We're putting wide beadboard type stuff on the outside and painting it the same color as the house. It's about 5'x5' and the peak of the roof is about as tall as I am.... 5'4". I'll post pics when it's finished. K decided to crawl in there and decorate with her old bedroom decor... it's too cute. Rugs, wall hangings stuck in the framework, even a little table.

PS-
Only a child could spot an empty flooring box and see a robot! It took me a second, but then I saw it. She didn't do anything to the box, this is the way it looked laying out empty. She later colored it and put glitter on it. More amazing... she's wearing matching jammies! lol

In the next episode.... finished Handmade Holidays goodies (with pics from the camera phone *pouts*)! 5 things down.... 1945577 more to go!!